Monday, 22 August 2016

Lesson 7 : Activity 1 (Temperature Sensor)

Lesson 7
Activity 1 - Temperature Sensor

Materials Needed:
·         1 X Arduino board
·         1 X Breadboard
·         1 X USB
·         1 X Temperature Sensor; TMP36
·         5 X Jumper Wires


Codes:

int analogVal;
const int tempPin = ;
� voltage;
float temperature;

void setup()
{ 
 pinMode (tempPin, ); 
 Serial.begin(9600);
}
void loop()
{
  analogVal=analogRead(tempPin); 
 voltage = (analogVal/1024.0)*5.0;  
temperature = 100*voltage-50;     
  Serial.println(temperature); 
 (200);
}

*Please fill in the blanks in the Arduino sketch.

Lesson 6 - Activity 4 (Automated Light (LDR) & Buzzer )

Activity 4
Automated Light & Buzzer (LDR)

Materials Needed:                                                  
LDR, buzzzer & LED circuit
  • Laptop
  • USB cable
  • Arduino Board
  • Breadboard
  • 1 x Buzzer 
  • 1 x 10kΩ
  • 1 x LDR
  • 1 x LED
  • 1 x 330Ω
  • 8 x Jumper Wires


Codes:
Please figure the codes yourself :)


Hint!!

1. Above is the codes for LDR and Buzzer Circuit

2. Please add in the Buzzer Circuit codes into LDR circuit codes
     (Example is on your left (const int buzzer = 9;))

3. Continue for the rest of the buzzer codes.

4. Verify and Upload the code.

5. Good Luck!!!


*Note: If you manage to do it get a stamp from your teacher. 


Thursday, 11 August 2016

Lesson 6: Activity 3 (Automated Light (LDR))

Activity 3
Automated Light (LDR)

LDR Circuit

Materials Needed:
  • Laptop
  • USB cable
  • Arduino Board
  • 1 x LED
  • 1 x 330Ω
  • 1 x LDR
  • 1 x 10kΩ
  • 6 Jumper Wires
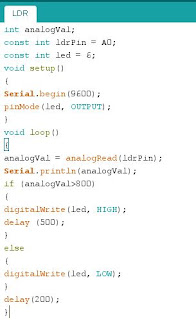
Codes: 

int analogVal;
const int ldrPin = ?;
const int led = 6;
void setup()
{
Serial.begin(9600);
pinMode(led, ?);
}
void loop()
{
analogVal = analogRead(ldrPin);
Serial.println(analogVal);
if (analogVal>800)
{
digitalWrite(led, ?);
delay (500);
}
else
{
digitalWrite(led, LOW);
}
delay(200);
}


Lesson 6: Activity 2 (Light Wave)

Activity 2 
(LIGHT WAVE - DIGITAL)

Light wave
Materials Needed:

  •  Laptop
  • Arduino Board
  • Breadboard
  • 4 LED (different colours)
  • 4 X 330Ω Resistors
  • 9 X Jumper Wires


Codes: 

const int ledR = 11;
const int ledY = 10;
const int ledG = 6;
const int ledB = 5;

void setup()
{
  pinMode(ledR, OUTPUT);
  pinMode(ledY, OUTPUT);
  pinMode(ledG, OUTPUT);
  pinMode(ledB, OUTPUT);
  }

void loop()
{
  digitalWrite(ledR, HIGH);
  delay(500);
  digitalWrite(ledR, LOW);
  digitalWrite(ledY, HIGH);
  delay(500);
  digitalWrite(ledY, LOW);
  digitalWrite(ledG, HIGH);
  delay(500);
  digitalWrite(ledG, LOW);
  digitalWrite(ledB, HIGH);
  delay(500);
 digitalWrite(ledB, LOW);                                            
 digitalWrite(ledG, HIGH);                                          
 delay(500);                                                                   
 digitalWrite(ledG, LOW);                                              
 digitalWrite(ledY, HIGH);                                            
  delay(500);                                                                   
  digitalWrite(ledY, LOW);                                            
  digitalWrite(ledR, HIGH);
  delay(500);
  digitalWrite(ledR, LOW);
  delay(1000);
}                                 

Lesson 6: Activity 1b (Buzzer & LED circuit)

Activity 1(b)
Buzzer & LED circuit 

Buzzer & LED circuit
Materials Needed:
  • Laptop
  • Arduino Board
  • Breadboard
  • 1 x Buzzer
  • 1 x LED
  • 1 x 330Ω
  • 5 x Jumper Wires
Codes: 
const int buzzer = 9;
const int led = _; 

void setup()
{
pinMode(buzzer, OUTPUT);
pinMode(led, ______);


void loop( )
{
digitalWrite (led, ____); 
tone(buzzer,260,200);
delay (1000);
digitalWrite (led,LOW); 
noTone(buzzer); 
delay (1000);
}

*Please fill in the blanks. 

Wednesday, 10 August 2016

Lesson 6: Activity 1A (Buzzer Circuit)

Activity 1A
Buzzer Circuit (Building an alarm)

Buzzer Circuit
Materials Needed:
  • Laptop
  • Arduino Board
  • Breadboard
  • 1 x Buzzer 
  • 3 x Jumper Wires
Codes:
const int buzzer = 9;

void setup()
{
pinMode(buzzer, ______);
}

void loop( )
{
tone(buzzer, ___,200);
delay (1000);
noTone(buzzer);
delay (1000);
}


*Please fill in the blanks.

Monday, 1 August 2016

Lesson 3 - [Assembly] LED with Resistors (10kΩ)

Activity 2

Assembling LED circuit with different Resistors

LED with 10kΩ Resistors

Materials needed:
  • 1 Arduino Board
  • 1 Laptop
  • 1 LED
  • 1 Breadboard
  • 1 10kΩ Resistors
  • 3 Jumper Wires

10kΩ Resistors

Lesson 3 - [Assembly] LED with Resistors (1kΩ)

Activity 2

Assembling LED circuit with different Resistors

LED with 1kΩ Resistors

Materials needed:
  • 1 Arduino Board
  • 1 Laptop
  • 1 LED
  • 1 Breadboard
  • 1 1kΩ resistors
  • 3 Jumper Wires

1kΩ Resistors


Lesson 3 - [Assembly] LED with Resistors (330Ω)

Activity 2

Assembling LED circuit with different resistors

LED with 330Ω Resistors

Materials needed:
  • 1 Arduino Board
  • 1 Laptop
  • 1 LED
  • 1 Breadboard
  • 330Ω Resistors
  • 3 Jumper Wires


330Ω Resistor